Last year on the bus trip my mom and I ran, we made project bags for everyone as their gift. I had a bunch of help making the 40 bags we needed, my mom, Roberta, Kathy, and Twyla who put on all the binding. They took a big chunk of my sewing time last summer but I've gotten a lot of compliments on the bags and I've seen a number of people using them so it was worth the effort. Several people have asked how to make them so I decided to write this tutorial.
I bought a pattern but it wasn't written well and I didn't like the way it was assembled so I decided to make up my own pattern. This isn't my typical response to a bad pattern but what the heck, it is basically just a square.
Materials list
2 Fat Quarters
18" X 22" of batting
15" or longer zipper
5" width of fabric for binding
13" X 14.5" vinyl
Walking foot or zipper foot (optional)
teflon foot (optional but very helpful)
Wonder Clips
Instructions
1. You need to quilt the fat quarter, all of it.
2. Cut a 14.5" square from the quilted fat quarter as well as 2 1.5" X 14.5" strips.
3. Sew the zipper to one of the quilted strips, right sides together using a 1/4" seam.
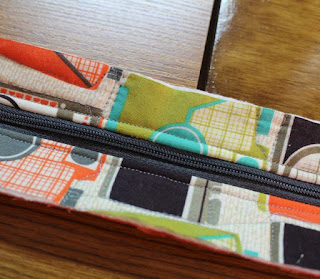
Turn the strip right side out and top stitch. I used my walking foot with the 1/4" inch guide to install the zipper and then run the guide right next to the teeth to do the top stitching. I seem to have more control this way but I'm sure a zipper foot would work as well. I like to use a 16" or longer zipper so I can sew the zipper on without the pull getting in the way.
4. Repeat for the other strip.
5. Sew the vinyl to the zipper strip matching the 14.5" sides using a 1/4" seam. The vinyl should be on the right side of the zipper strip using a teflon foot. If you don't have a teflon foot I've read that you can put Scotch Brand Magic Tape on the under side of your of your metal foot. Don't use pins to hold the vinyl in place. The holes won't go away. I used Wonder clips.
6. Turn the vinyl under and top stitch in place.
7. Line up the top of the zipper unit with the fabric to the top of the quilted fabric square. Keep them lined up with Wonder Clips. The vinyl will be hanging over the edge of the quilted fabric square. You can trim it off now. Before you start sewing, make sure the zipper pull is inside the square. Take it from experience the bag will be useless unless the zipper pull is inside the square.
8. Sew 1/4" around all 4 sides. (Is the zipper pull between the two lines). You need to make sure you use the teflon foot on this or the vinyl will be distorted and crooked. Trim the zipper.
9. I used a 2.25" strip for the binding. You'll need 2 width of fabric strips. Sew the binding on as you normally would. I used the short version of the binding tool. I use the longer one all the time and the only difference is the short one is a bit more fiddely.


No comments:
Post a Comment